Author: krpadmin

  • How to use the rule of thirds in photography

    Good photography isn’t only about your camera. You also need a good view, technical skill, and practice. The photographic composition can make your photography great. The composition is the backbone of good photography. Every object in your shot makes a good balance in your image.

    If you’re new to photography, you may be trying to understand the Rule of Thirds. The Rule of Thirds is perhaps the most well-known ‘rule’ of photographic composition. One of the most popular ways to compose your photographs is to use the “Rule of Thirds”.

    What is the Rule of Thirds?
    The rule of thirds is one of the most popular composition and it’s very easy to understand. Divide your images into thirds vertically and horizontally before shooting. You can use the built-in grid line tool in your DSLR and mobile camera. Using two horizontal and two vertical lines spaced evenly across your photograph. This creates a tic-tac-toe pattern, as shown in the image below.

    the Rule of Thirds

    The four lines will intersect at four points. These are the points where your point of interest should be. Your subjects don’t have to match the lines or intersecting points perfectly. Just position them close to the guide points or lines laid out by the rule.

    The key element of the image is placed on or near the ‘hot spots’. For example, if you are shooting a portrait, make sure the eyes of your subject are near any one of the intersection.

    the Rule of Thirds

    Editing software like photoshop and lightroom also have built-in overlays that allow you to apply the rule of thirds to existing photographs. The Rule of Thirds is not so much a rule as it is a guideline to keep in mind when you are taking photos.

    Overall, using the rule of thirds will help you achieve more aesthetically pleasing compositions. It’s important that you don’t overthink when using this rule.

    If you enjoyed this article and know of someone who would also find it helpful, please share it with them. 

    Read more resource on:

  • Tips for Photographing Water Reflections at Night

    One such type of photo is one in which a mirror image is created with a water reflection. It takes several different camera settings and only the right lighting conditions to create a wide range of water for the desired look.

    Reflections can be a great addition to your photographs at any time of day or night, but they are especially appealing at night. Adding reflections can help you solve compositional issues that arise at night. Furthermore, the steps you must take to capture photos at night, such as using a tripod and a slow shutter speed, actually make it easier to capture reflections.

    When capturing reflections in your photography at night, get down close to the water. That way, you’ll include much more reflection in your photos.

    It is amazing when all comes together after sunset; the city lights start glowing and those reflections produce brilliant results. The key to successful night photography is a solid tripod, as long exposure times are common and a bit of patience.

    Nighttime Water Reflection Photography: 5 Tips and Tricks

    • Set your camera to manual mode because auto-focus does not work sufficiently in low light.
    • Night photography requires slow shutter speeds. Because it is dark and your camera needs to hold the shutter open a long time in order to gather sufficient light for the exposure.
    • Utilize the camera’s self-timer, a cable release or remote release to trip the shutter.
    • Use a smaller aperture (around f/11 for landscapes or f/5.6 for smaller objects and area size)
    • When taking still photos at night, it’s a good idea to set your ISO to the lowest setting possible on your camera. Try not to go above ISO 400 or 800.
    https://www.instagram.com/p/B4VGYXohVeF/?utm_source=ig_web_copy_link

    I hope I explained some of my quick tips for better night photography. If you have any questions regarding this post, please leave them in the comment section below.

    Check out How to use the rule of thirds in photography

    Thanks for reading!

  • Japan’s Cherry Blossoms

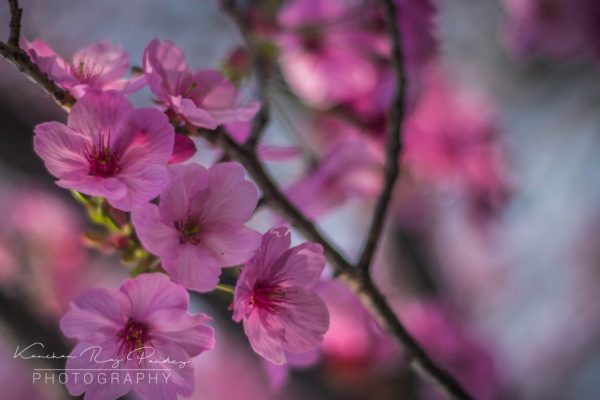
    In Japan, the appearance of cherry blossoms, known as sakura, signals the beginning of spring. Sakura (cherry blossoms) blanket the Japanese landscape in the spring, painting the country with its gentle pink hue. Sakura (桜) is a general name for plants that belong to the subfamily of the Rosaceae. The English name for sakura is cherry blossom.

    The Sakura or Cherry Blossom is one of Japan’s most popular seasons of the year. Like in many countries, the flora is flowering and warmer weather arrives, and everyone is very welcome to enjoy the season. Depending on the weather conditions and location, the best time you can look at the beautiful pink colors between March and May.

    However, they are more than simply beautiful trees, as the sakura has powerful ties to Japan’s history, culture, and identity. In the limited flowering period, the Japanese love to celebrate and cherish cherry trees and many people celebrate flower-watching festivities known as Hanami. In view of the cultural importance of the sakura, the flowering of the Cherry bloom is a focus of countless events, festivals and specialty tours.

    Locals organize local festivals each year in spring. Hanami refers more specifically to observing the full blossom of the cherry trees. Hanami, probably the easiest thing to do in Japan, is very easy to do: enjoy the sight of the whole flower of the sakura tree(s). You can walk around the park and have a picnic from a distance or close by. Just don’t touch the sakura, pull them, and bring your waste with you.

    Sakura flowers bloom and die fast. Floral petals constantly fall down and paint the ground with a beautiful carpet of pale pink or white petals.

    I could not take more photos because of the corona virus. Maybe next year I will try to take as much as more photos of Sakura.

    Enjoy the Cherry Blossom (Sakura at Toneri Park Tokyo, Japan)

  • Shinjuku Night walks, after dark.

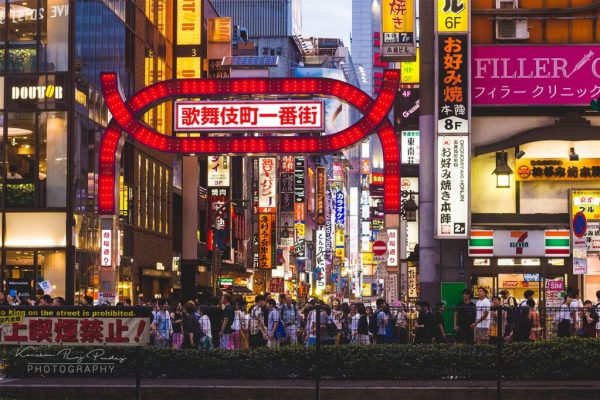
    When the sun sets in Tokyo, the city blinks neon and takes on a new identity. opportunity to take photos with light displays. Enjoy these street shots of Shinjuku after dark. Night comes and the streets of Shinjuku become full of people looking for a good time. Places like Kabukicho and Omoide Yokocho are filled with places to drink and eat. They literally overflow with people out looking for a good time.

    It requires you to manipulate ISO, aperture, and shutter speed among many other things. Follow these eight useful techniques to help you shoot in the dark. Once you learn the basics, you’ll find out that night photography is really fun. Don’t be afraid to experiment and you’ll be rewarded with stunning images you’ll be proud of.

    The main challenge when photographing at night is getting a proper exposure.

    1. Find a Tripod or Something for Support
    2. Use manual focus
    3. Use low ISO if possible
    4. Shoot RAW
    5. Take test shots
    6. Bracket your photos
    7. Shoot in Aperture Priority Mode for static subjects
    8. Play with different shutter speeds
    Tokyo, Shinjuku at night
    Photography Night view in the Shinjuku district in Tokyo
    Godzilla Road at Night, Shinjuku, Tokyo, Japan
    Godzilla Road at Night, Shinjuku, Tokyo, Japan
    Kabukicho District, Shinjuku, Tokyo, Japan
    Kabukicho District, Shinjuku, Tokyo, Japan
    Kabukicho is a night life area in Tokyo which has many neon strip light.
    Kabukicho is a night life area in Tokyo which has many neon strip light.
    Street junction and pedestrian crossing at night, Shinjuku Tokyo
    Street junction and pedestrian crossing at night, Shinjuku Tokyo

    Check out Tips for Photographing Water Reflections at Night

  • Enoshima Island Day Trip

    The last day before the holidays, we were having our lunch. this idea came to my mind. Oh, how about going on a trip? Then and Sanjeev started browsing the internet looking for beautiful destinations to visit around our place. Sanjeev came up with a beautiful destination Enoshima Island.

    It is one of the small islands west of Kamakura. There were two alternatives while going to Enoshima Island by train through the Odakyu line. Either going through Odakyu Romance Car from Shinjuku to Enoshima without transfer or getting from another train of Odakyu line with the transfer. So we took the second option and our Journey starts from Shinjuku Station to Enoshima. It costs us JPY 630. The journey takes about 1 hour 15 minutes.

    We four friends (Anil Shrestha, Sanjeev Budha, Sagar Giri, and Me) gathered at the Odakyu gate at Shinjuku Station. We’ve taken the South Entrance of the Odakyu Line. And our destination for that day was Katase-Enoshima Station, which was one of the nearest stations to Enoshima Island on the Odakyu line.

    Reaching there we found Enoshima island was a very relaxing island to visit and every location can be accessed by walking, strolling around enjoying the most beautiful sights.

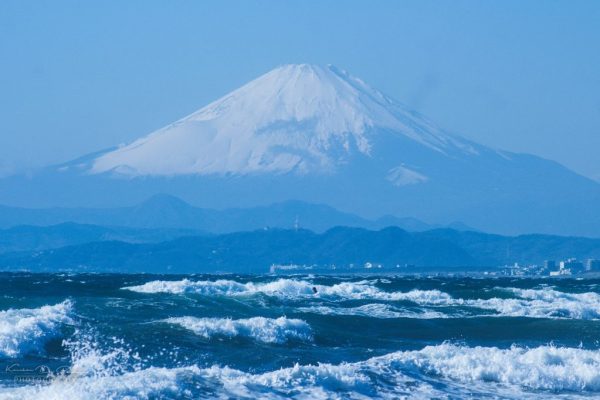
    Katase Nishihama Beach (片瀬西浜) was another sand beach in the western opposite of Enoshima Island. The scenery of the beach was really beautiful and Mount Fuji, Izu Peninsula, and mountains in Hakone were seen in the west. The scenery in the dusk was splendid, too. This beach was most popular with Japanese, so it used to be crowded during the summer season.

    Enoshima Shrine has three parts to it: the Outer Shrine (Hetsunomiya), the Middle Shrine (Nakatsunomiya), and the Inner Shrine (Okutsunomiya). It’ll only take a few minutes, if that, to reach the Outer Shrine area. It just takes a 20 min walk after crossing the ocean via the connecting bridge to Enoshima Island. Give yourself a little time to explore and look around. You’ll see quite a few restaurants on the way to the Inner Shrine, and it’s a good time to fortify yourself.

    Lastly, we visited the Iwaya caves of Enoshima again by following the signs on our way on the island. These caves are located on the southern coast and you get an amazing view of the ocean. In the caves, you will find a statue of the legendary Dragon. It costs you an entrance fee of 500 yen.

    Overall we had a great new year’s eve at Enoshima island.

    Enoshima island travel vlog

    The 10 Best Spots in Tokyo for Instagram Photos

  • Swayambhunath (Monkey Temple)

    Located atop a hill west of Kathmandu city, the Swayambhunath complex has been in use since the 5th century A.D. and consists of a magnificent domed stupa, as well as a variety of shrines and temples. Each temple is extremely ornate and richly decorated with gold and vibrant prayer flags, though it’s not only the spiritual décor that draws visitors.

    Shyambhunath

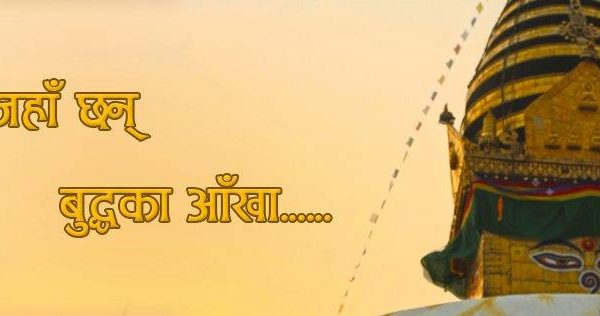
    Located on a small hillock named Swayambhunath, this temple is a famous one located to the northwest of the Kathmandu Valley. Famously known as the monkey temple, this tourist destination receives pilgrims and tourists from every nook and corner of the world. According to mythology, the glory of this destination started from this structure. The central white stupa is topped by a golden spire that depicts Buddha’s eyes in all the four directions. It is surrounded by beautifully-carved temples, statues of deities, fluttering prayer flags, and Buddhist prayer wheels.

    The central white stupa is topped by a golden spire that depicts Buddha’s eyes in all the four directions.

    A powerful earthquake measuring 7.8 has killed hundreds of people in Nepal. Many historic buildings have been damaged – such as Swayambhunath temple complex.

    It is best to visit the temple early in the morning before 9 am. This is the time you can find many rituals and pilgrims in the complex. With regards to climate, the spring and fall are the best times to visit Kathmandu. September to mid of May is the right time to visit the temple.

    The temple is easily accessible by foot, bike, or taxi from Kathmandu.

  • Fall in Japan is the Best!

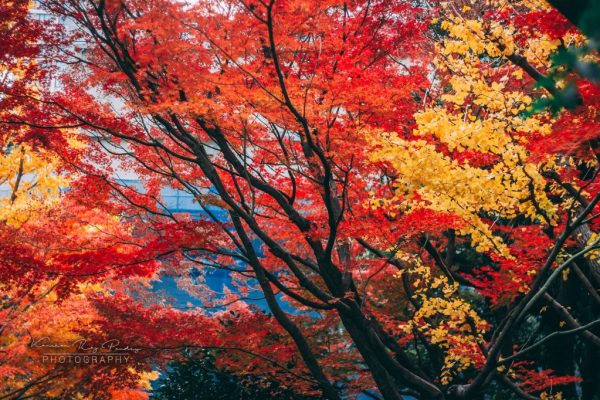
    Are you planning a trip to Japan to see the autumn leaves? Looking for the best places in Japan to enjoy the fall? As maples and other autumn leaves slowly turn the entire country into vivid red, yellow, and orange colors, the autumn color season in Japan is as beautiful as the cherry blossom season.

    As summer transitions to autumn, Japan begins to cool down, offering temperate weather that’s perfect for outdoor walks. From mid-November to early December, the trees turn vivid hues of red, orange, and yellow. It’s this combination of cool weather and striking sights that make fall one of the most popular seasons for traveling to Japan. Colorful autumn leaves, known as Koyo in Japanese, draw just as many visitors in autumn as the cherry blossoms do during spring.

    Traditional gardens and parks showcase these autumn colors and attract crowds of visitors eager to see the changing leaves.

    Autumn is a season of pleasant temperatures, stunning fall foliage, festivals, and delectable food. It is an excellent time to visit Japan! We hope the information provided above assists you in planning and enjoying your trip.

    https://www.instagram.com/p/B6C3pOWFaIN/?utm_source=ig_web_copy_link

    The best destinations to see autumn leaves and when to see them for you. 

    RegionMajor SpotAnnual Peak Season
    HokkaidoSapporo, Hakodate, Shiretoko PeninsulaMid to late October
    Tohoku Region Sendai, AkitaMid-November
    Kanto Region Tokyo, Hakone, Nikko, KamakuraLate November
    Kansai Region Osaka, KyotoEarly December
    Chubu / Hokuriku Regions Nagoya, Kanazawa, NiigataLate November
    Chugoku / Shikoku Regions Hiroshima, KagawaMid-November
    Kyushu Region Fukuoka, Takachiho Gorge, KagoshimaLate November

    You may Like: Japan’s Cherry Blossoms in 2020 and 2021

  • My US Visit 2016

    I still remember my first day in the office. It was Tuesday, November 10, 2009. Back then, this company was just a start-up. Today, we can proudly consider Deerwalk as one of the largest and best IT companies in Nepal. The growth has been phenomenal and I consider myself lucky to be a part of this outstanding growth. At Deerwalk, I have always felt myself at home, from day one, where I am able to freely share my ideas, knowledge, and expertise. When the company decided to let me visit our US office located at 430 Bedford Street, Lexington, MA,

    It was an opportunity for me to see the other side of the world from my own eyes.

    it was an opportunity for me to see the other side of the world from my own eyes. I love traveling but this would be my first experience traveling outside the country and I was excited to experience American life.

    The route was Kathmandu – Doha – Boston. My flight was scheduled at 9:30 PM on July 10, 2016. I reached Doha, Qatar at 11:30 PM and my flight from Doha to Boston was the next day at 8:20 AM. So, the airlines offered me a room at Retaj Al Rayyan Hotel to spend a very comfortable night at Doha. I must say, the Qatar flight was simply awesome as they have very good service and delicious food. I reached Boston on July 11.

    Boston
    As I got out of Logan airport in Boston I could see two familiar faces with a big smile in the crowd: Sanjeev Tuladhar and Manish Luintel. They drove me to Sanjeev’s apartment in Belmont. My first day at the US office was just like my first day at school; I was a little nervous but super excited to learn new things in a different environment. I would like to thank all the staff there for being so caring and helpful which helped me settle easily. A normal day at Lexington office starts with a morning standup where we discuss issues and plan for the rest of the day. Soon after, everyone becomes busy with client calls, followups, and calls with Nepal Team. It was a pleasure getting to know fellow Deerwalkers especially Smriti, Liana, John, Messi, Namita, Rob, Ashay, Manish, Sagar, Dave, Jeff, Gerardo, Sushant, Ed, Obina, and Kevin.

    Manish was the “designated” tour guide/photographer. He showed me around Boston to show some popular places in the city: namely Harvard Square, Quincy Market, Harvard College, and Boston Harbor. I also got to see the Downtown skyscrapers. I also tasted various cuisines: Japanese, Indian, Chinese, Mexican, and Thai. Nepal is a landlocked country and we do not have a beach which is why I really enjoyed my time at the beach in Boston.

    Taking a stroll on the beach is such a calming experience and taking photos in the beach felt even better.

    Taking a stroll on the beach is such a calming experience and taking photos on the beach felt even better. The most American thing I did during my stay in Boston was to watch a baseball game with Abanish. The tickets were provided by Dave (God bless Dave and America!). I also got a chance to visit different supermarkets and malls which were very different from the ones we have in Kathmandu. I went to a casino where I lost $ 5 and though it is not my proudest moment it definitely tops the list of exciting things that I did.

    New York Visit:
    New York City is a fast-paced, globally influential center of art, culture, fashion, and finance. I was desperately waiting for the weekend to begin and set out to explore New York. I traveled by Go Bus from Alewife Bus Station on Thursday. My brother-in-law picked me at Manhattan and he took me to his apartment at Jackson Height, where I was warmly welcomed by his beautiful daughter and gracious wife. We went to visit the most popular places in New York: the World Trade Center Memorial, Statue of Liberty, Rockefeller Center, The Brooklyn Bridge, Times Square, Central Park, and Far Rockway Beach. I was traveling by train most of the time, which again was a new and exciting experience for me.

    The month-long US stay was a good time to rejuvenate in a new environment, reconnect with old friends, make new friends, and learn the American culture and lifestyle. I made lots of memories in this US visit and look forward to making more in the days to come.

  • My Short Nepali Movies

    Kanchan's Blog Film Making

    What is a short film?
    A short film is any film not long enough to be considered a feature film. They can last up to 40 minutes and be as short as 5 minutes. Short films are a great way to develop your filmmaking skills and make your creative mark.

    7 Tips On Making A Short Film

    1. Outline your idea and write out your script.
    2. Make a Story-board for each shot in the film.
    3. Choose the actors and crew.
    4. Make a simple and quick scene
    5. Decide the scene you need in each shot and make a plan accordingly.
    6. Choose a shooting location (external or internal)
    7. Determine the equipment you are going to use (like a camera, lenses, light, mic, etc)

    I have always loved photography and this helped me discover my passion and skills in visual art. Being a parallel belt, photography helped me understand my interest in film making. I tried to make some short movies.

    Please subscribe to my YouTube channel

    Sci-Fi Short Nepali Film | Fade Out (Holi Special)
    This story is about a girl and a water gun.

    Homework – 60 Sec Short Nepali Film
    Education is by far the main priority of every child and parent. Over the years different generations have had varying levels of the load when it comes to school work, with every successive generation having to bear more load than the last.

    In an age where information is regarded as the supreme power, have we forgotten what it is like to be a child? Have future responsibilities of adult life replaced the joyful playfulness and sense of discovery of the child?

    Euphoria | Happy Valentine’s Day Short Film
    Sudden happiness, a feeling of bliss, the joy that came of freedom and a new life – these were the gifts she gave to him.

    Encounter – Short Nepali Action Film
    he hopes of the government rest on one agent as he embarks on a mission to save not just a girl but the secret she carries with herself. A secret which, is decoded by the criminal underground could spell disaster for the country. Our agent has but one order, find and kill the kidnappers and save the girl. Prepare yourselves as the agent loads his gun and prepares for the imminent encounter.

    Computer Engineer – Short Comedy Film
    What kind of questions faced by computer engineers in their daily life.